Trash to Treasure: Bar Car Edition
We all know that bar carts are all the rage right now and who’s surprised? Not I- even if you don’t want to use them to house alcoholic beverages, how can you not be a fan of a bit of extra storage that you can move around?! Consider me sold. I’ve been on the prowl for one for some time now, keeping my eyes open at Target, Home Goods, Ikea, etc. for something that was reasonably priced and decent on the eyes… to no avail. What’s the saying? When you stop looking is when you’ll find it… Not what you were expecting, huh? Me neither. Well, our church recently did a purge on old and broken things throughout the building that had seen better days and needed to be disposed of… and I happened to see this in that pile.
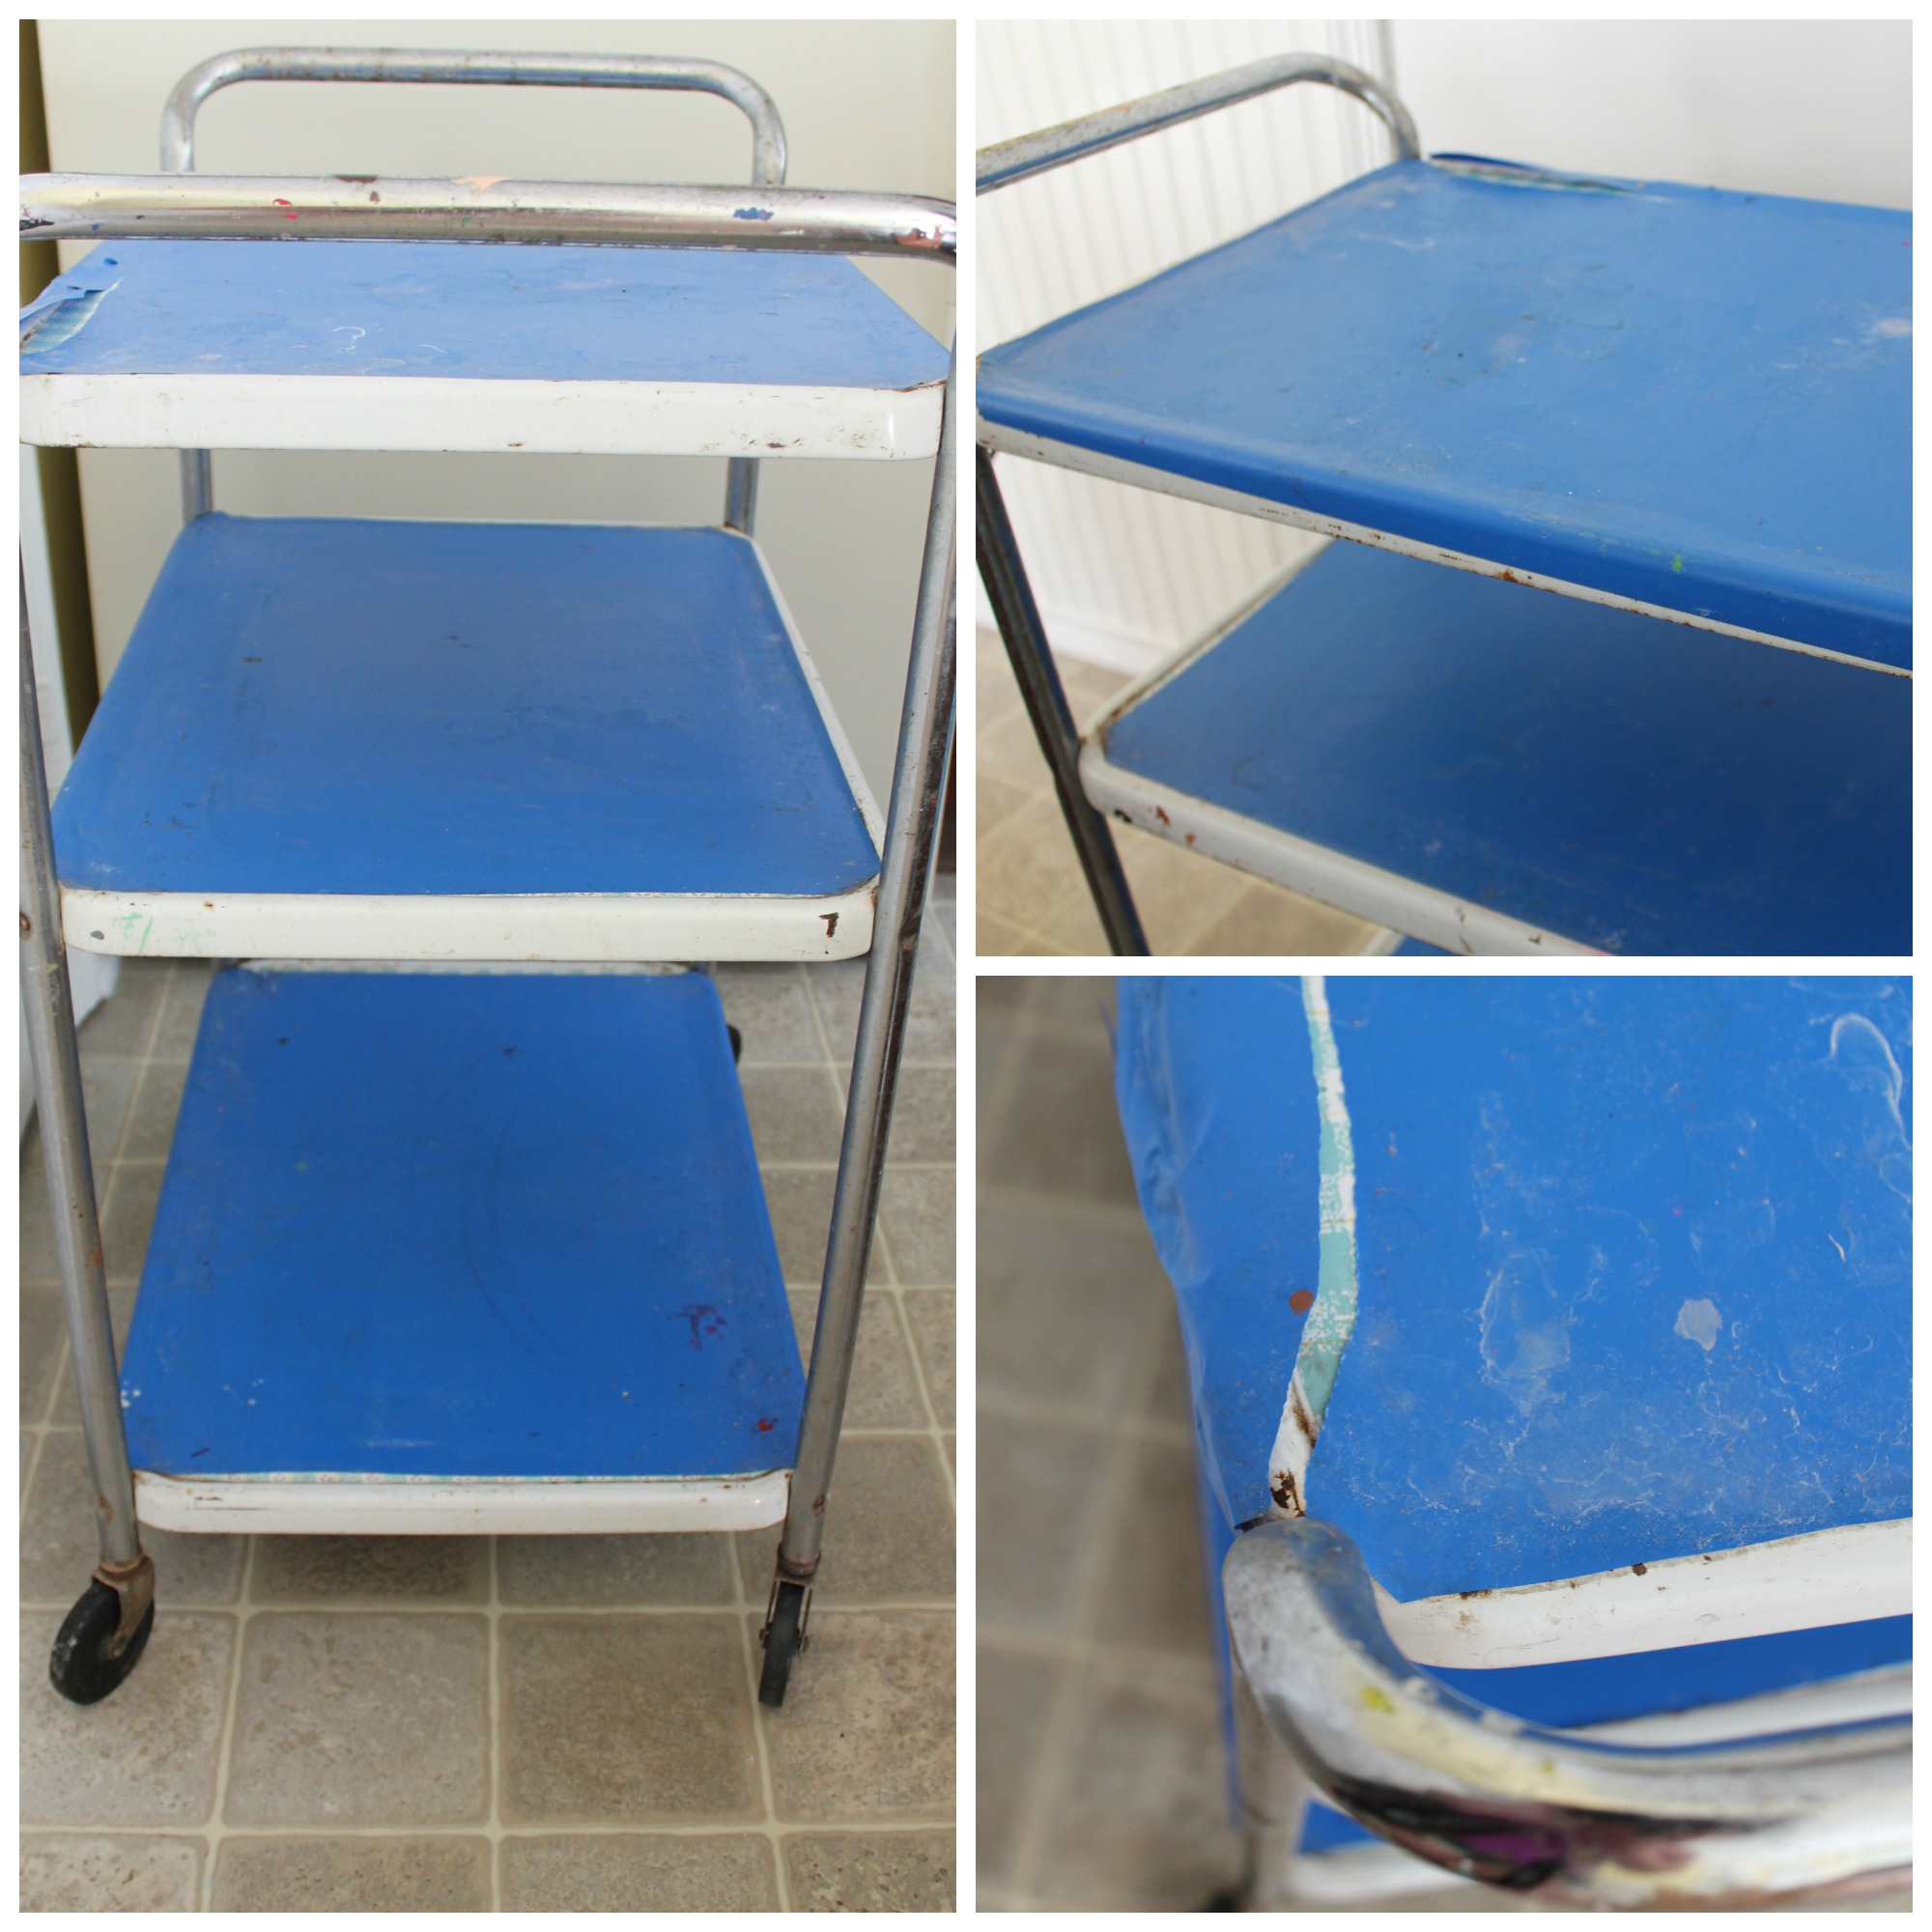 Yep, in all it’s contact paper, rust, and paint-y glory I begged them to let me take it home. I knew that, with a little bit of TLC, I could turn him into something shiny and new. I know I just got the Madonna song stuck in your head… sorry about that. So, without further ado, here is the step by step breakdown of how I took the trash and made a treasure- oh, and there are a few Helpful Hints (aka. things I learned along the way) that I threw in for good measure.
Step 1: Remove all contact paper and wipe clean. I had to get down to the bare bones of the cart, so I spent some time peeling (both) layers of contact paper to reveal three very promising white shelves.
And after all of the peeling, I was left with this:
 A (still sticky from the contact paper) sturdy frame to work with. And this is how it sat for about a month in our kitchen until I
 worked up the energy found a spare second this summer to continue the makeover. Which brings us to…
Step 2: Disassemble the cart into individual pieces. When I flipped the entire thing over, I found this: Each tray is held in place to both handle/legs by four washer and screw combinations. All I did was unscrew each of the screws to break down the cart into its original pre-assembly condition. Here comes Helpful Hint #1: Grab a small dish or tray to hold the screws and washers until they are ready to be reused for reassembly. This helped ward off any lost parts.
 After everything was taken apart, the cart looked like this:
 Helpful Hint #2: Label the bottom of each tray in the order that you take it apart to make the reassembly easier. I used a T (top), M (middle), and B (bottom) so that there was no confusion when trying to put it all back together.
 Step 3: Sand each piece to get rid of any leftover residue and to prepare for paint. This was a lot easier than I thought it would be- all I did was spend a few minutes on each piece to remove some of the glue from the contact paper, any paint (it had previously been used in a classroom), and rust from the metal.

I had good results using a sanding block (technical term?) with 150 or so grit. Probably the finer, the better, but I just used what I had. In the end, I didn’t get every single bit off, but I just sanded until I was okay with the smoothness of each shelf. I used a piece of sandpaper for the legs because it was easier to wrap around to get an even sand job. It’s hard to see, but in the picture below the left piece has not been sanded and the right has- in person, it made a pretty significant difference.

Step 4: Wipe down each piece with a wet rag and let fully dry.
 Step 5: Time to paint! I used white spray paint for the trays and gold (both from the Rustoleum line) for the handles. I started on the bottoms of the trays and let them fully dry before I painted the tops. As no one will ever really see the bottoms of the trays, I just gave them a quick 1-2 coats, whereas the tops got 3-4.
 What a change a few coats of white paint can do to a formerly rusted, painted, and papered piece of metal!
 Next to get the royal treatment were those cloudy silver handles.

Get ready for Helpful Hint #3: Tape off the wheels using painters’ tape to ensure that they keep their black color, while the metal gets the gold.
 (Optional) Step 6: Apply sealer if you plan on using the bar cart outdoors. I used some Indoor/Outdoor Helmsman Spar Urethane that I already had. Although it is meant for wood, I did some Googling and read that people had used it with success on metals. Their only warning is that it dries with a yellow-ish tint, so be careful about using it to seal art pieces that might be tainted with such a finish. I will say this: In using this on white shelves, I definitely saw what they meant! However, I did not apply thick coats (using more of the product would yield more of a tint) and the sunlight seemed to cut down on the visibility of the yellow-ish haze. When you look at the cart, it still looks bright white and because we are planning to use the cart outside for the most part, having it sealed was important. There are probably better products to use, so if you know of one, leave it in the comments for other readers!
Step: Let dry and reassemble. All we did was put things back together in the same order I took them apart. My Helpful Hint #4 would be: Stick all screws through a piece of cardboard (thanks for the cool trick, Nancy H.!) and spray paint them the color of the piece.  Reassembly was probably the easiest and most rewarding step of them all- after all, who doesn’t love a finished product?!

The cart lives outside (and has been there for a few weeks now) and has held up great! We’ve had rain and wind that have created dirt and mud, but the surfaces are all pretty wipeable (thanks to the sealer). For general function, this piece is great- it can be moved around, we can use it indoors if we want, and it has already successfully served as the drink station at a youth group cookout we hosted. To shoot it, I was pretending to host a brunch of some sort- complete with all the beverage options you could ever want… water, OJ, coffee, hot chocolate, you name it. 🙂 Yes, I now realize that I was playing… tea party.

 And how about one final shot of those gleaming white shelves? Yep, I’m in love.
 Any trash to treasure adventures you’ve been taking lately?
-Leslie
This project has been featured at:


Related Posts

The First Project: Building Open Shelving in the Kitchen
Back in April, we said we wanted to begin posting again like we used to…
A Chalkworthy Makeover
This post is part of our collaboration with Chalkworthy. All opinions are 100% my own…